How to Braze Aluminum A/C Lines with Weld-Strength Results
Aluminum air conditioning lines take a lot of abuse. Vibration, corrosion, and accidental damage can all lead to cracks or leaks that make a vehicle’s A/C system stop working. Replacing these lines can be expensive, especially when the part is difficult to access or discontinued.
Brazing aluminum offers a practical repair option. With the right materials and proper heat control, you can join aluminum components and restore the strength and integrity of the line. The result is a clean repair that holds pressure and withstands vibration in demanding environments.
This guide explains how to braze aluminum A/C lines using an aluminum repair rod, powder flux, and an oxyacetylene torch. The process is straightforward once you understand how aluminum behaves under heat and how to manage the brazing temperature.
Understanding Aluminum Brazing
Brazing aluminum is a joining process that bonds metals without melting the base material. Instead, a filler rod melts and flows into the joint, creating a strong metallurgical bond between the parts.
Compared with traditional welding, brazing works at lower temperatures and requires less specialized equipment. It is especially useful when repairing aluminum components with different thicknesses, such as air conditioning lines and ducting.
When done correctly, the joint can be extremely strong and leak-resistant, making it suitable for automotive A/C systems.
Tools and Materials Needed
Before starting the repair, gather the necessary tools and supplies.
Essential Equipment
- Aluminum brazing rod
- Powder flux designed for aluminum
- Oxyacetylene torch
- Clean wire brush or abrasive pad
- Protective gloves and eye protection
- Lukewarm water for flux cleanup
Using the correct torch setup is important. Aluminum dissipates heat very quickly, which makes maintaining brazing temperature more difficult than with steel or copper. An oxyacetylene torch provides enough heat to compensate for this rapid heat loss.
Preparing Aluminum A/C Lines for Brazing
Proper preparation makes the brazing process much easier and improves bond strength.
Clean the Base Metal
Remove dirt, oil, and oxidation from the aluminum surfaces. Aluminum naturally forms an oxide layer that interferes with bonding. Cleaning the metal allows the filler rod to flow properly into the joint.
A stainless steel brush or abrasive pad works well for this step.
Apply Flux to the Rod
Dip the aluminum rod into the powder flux before starting the repair. The flux performs several important roles:
- Removes oxidation during heating
- Improves filler metal flow
- Helps the braze bond to the aluminum surface
It also acts as a temperature indicator during the process.
Step-by-Step Guide to Braze Aluminum A/C Lines
Once the parts are clean and prepared, the brazing process can begin.
1. Preheat the Base Metal
Start heating the aluminum components with the torch. Focus the heat primarily on the larger or thicker piece of aluminum.
Move the flame side to side, so the metal heats evenly across the joint. Aluminum conducts heat quickly, so broad flame movement prevents cold spots.
2. Watch the Flux Carefully
As the metal temperature rises, the powder flux begins to change. When the flux turns from a dry powder into a liquid, the aluminum has reached approximately 600°F (800°F for large or thick masses, aluminum boats etc.) This is the working temperature for the brazing rod.
3. Apply the Brazing Rod
Once the proper temperature is reached, touch the rod to the heated joint. The filler metal should begin to melt and flow into the seam. Continue moving the heat source while feeding the rod into the joint. Keeping the torch moving prevents overheating and protects the flux from burning away.
If the rod does not melt smoothly or begins to ball up, the aluminum is still too cold. Apply more heat to the base metal before continuing.
4. Complete One Side of the Joint
Work along the seam until the entire joint is filled. Ensure the filler metal flows evenly across the connection between the two aluminum A/C lines.
5. Turn the Part and Repeat
After completing one side, flip the component over and repeat the brazing process on the opposite side. Brazing both sides of the joint improves strength and ensures the connection is fully sealed.
6. Cleaning the Brazed Aluminum Joint
After the repair cools, remove any remaining flux residue.
Flux is water-soluble and can be cleaned easily with lukewarm water and a wire brush. Once the part is clean and dry, the aluminum A/C line is ready to reinstall in the vehicle.
A properly brazed joint should appear smooth and evenly filled along the seam.
Important Tips for Successful Aluminum Brazing
Aluminum brazing requires good heat control and attention to detail. These tips can help improve results.
Add Flux to Increase Bonding: Every time additional rod is applied, add more flux. This keeps the joint clean and promotes strong bonding.
Use Flux as a Temperature Guide: Flux is the most reliable temperature indicator during aluminum brazing. When it liquefies, the base metal has reached the correct working temperature.
Heat the Base Metal First: The torch should heat the aluminum parts first, not the rod. The rod should melt from the heat of the base metal rather than directly from the flame.
Keep the Flame Moving: Because aluminum dissipates heat quickly, constant flame movement is essential. This keeps the metal above the brazing temperature.
Use the Right Torch Setup: Large aluminum components require significant heat input. An oxyacetylene torch provides the necessary heat to maintain temperature across thicker sections. Brass nozzles or low heat torches are generally ineffective on large aluminum masses.
Why Brazing Works Well for Aluminum A/C Repairs: Automotive air conditioning lines must withstand pressure, vibration, and temperature changes. Brazing produces a strong bond that holds up well under these conditions.
The process also allows you to repair aluminum components with different thicknesses without melting the base metal. This reduces distortion and makes the repair easier to control. For many technicians and DIY mechanics, brazing aluminum is an efficient way to restore damage A/C lines without replacing expensive components.
Learning how to braze aluminum opens the door to many practical repairs. Aluminum A/C lines are a perfect example. With the right brazing rod, proper flux, and steady heat control, damaged aluminum tubing can be restored quickly and reliably.
Once you understand how aluminum reacts to heat, brazing becomes a dependable technique for repairing aluminum components that would otherwise be discarded.
Disclaimers:
Please visit https://www.aws.org/Standards-and-Publications/Free-Resources/#YourResources prior to using our welding products, and adhere to all AWS welding safety guidelines.
Further product safety information is available at https://muggyweld.com/safety-guidelines
Muggy Weld LLC shall not be liable for any loss, injury, claim, liability, or damage of any kind resulting in any way from (a) your use of this Site, (b) any services or products obtained from this Site, (c) any errors in or omissions from this Site, (d) the unavailability or interruption of this Site or any features thereof, (e) any content contained on this Site.
MSDS sheets available with purchase from MuggyWeld.com, upon request.
Updated 3/19/26
Check Out These Products
-
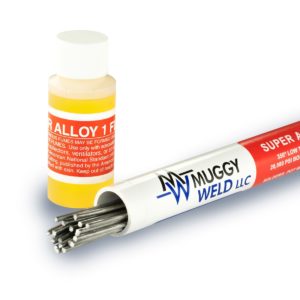
Super Alloy 1 Low-Temperature Solder
Price range: $69.00 through $109.00350º F multi-metal solder joins pot metal and all white metals, in any combination🌡 Melting Temperature 350 / 177 ⇄︎ Bonding Strength 20000 psi, 137.89 MPa -
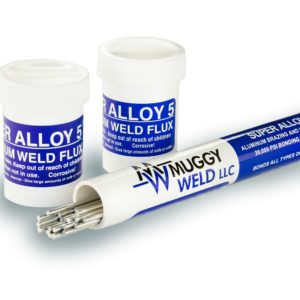
Super Alloy 5 Aluminum Welding and Brazing Rod
Price range: $69.00 through $109.00600°F aluminum welding, brazing, and soldering rod. Ideal for aluminum boat repair and cast aluminum.🌡 Melting Temperature 600 / 317 ⇄︎ Bonding Strength 30000 psi, 206.84 MPa -

SSF-6 Silver Solder Rod: Flux-Coated SSF-6 56% Brazing Rod
Price range: $135.00 through $600.00High-Strength, 56% Silver Solder Rod🌡 Melting Temperature 1150 / 621 ⇄︎ Bonding Strength 70000 psi, 482.63 MPa 🔧︎ Sizes Available (in) 1/16 🔧︎ Sizes Available (mm) 1.58