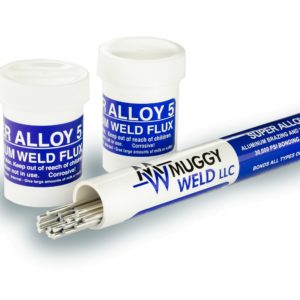
Aluminum Brazing Rods for Joining Thin Aluminum with Super Alloy 5
Super Alloy 5 aluminum brazing rods are well suited for joining thin aluminum parts using a handheld propane torch. With a working temperature of approximately 600°F, the alloy flows into the joint without melting the parent aluminum, reducing the risk of warping, sagging, or burn-through.
In this video, two thin aluminum plates are positioned perpendicular to one another and joined using Super Alloy 5 and a simple propane torch. Watch how the alloy flows from front to back and side to side through capillary action, penetrating the connection between the plates.
The finished joint has a smooth, extruded appearance, illustrating the flow and penetration capabilities of Super Alloy 5 aluminum brazing rods.
How Aluminum Brazing Rods Flow Through Thin Aluminum Joints
One of the advantages of Super Alloy 5 is its ability to flow through narrow joints and bond to the surrounding aluminum. When the parent metal reaches the correct temperature, the molten filler moves through the connection by capillary action.
In this application, the two aluminum plates form a right-angle joint. As the propane torch heats the aluminum, the alloy flows between the plates, moving from front to back and side to side.
This penetration allows the filler metal to reach areas that would be difficult to fill by simply depositing material along the outside of the joint. The result is a continuous connection with minimal pinholes or porosity when the aluminum is heated and fluxed correctly.
Super Alloy 5 is also formulated to bridge gaps and build up missing aluminum, although the two-plate application shown here focuses on its ability to flow through a joint.
Low-Temperature Aluminum Brazing at 600°F
Super Alloy 5 aluminum brazing rods have a working temperature of approximately 600°F, about half the melting temperature of pure aluminum.
Because the parent aluminum remains solid during brazing, the process reduces the risk of distortion compared with methods that require melting the base metal. This is useful when joining thin sheet aluminum, where excessive heat can quickly damage the workpiece.
The lower working temperature offers several advantages:
- Reduces the risk of warping and burn-through
- Allows thin aluminum to be joined with a handheld propane torch
- Helps preserve the shape of the original aluminum parts
- Provides greater control when applying filler metal to small joints
- Allows the alloy to flow through the connection without melting the parent metal
Super Alloy 5 has a published bonding strength specification of 30,000 PSI. Actual joint strength depends on the aluminum being joined, surface condition, joint design, and brazing procedure.
The alloy’s flow characteristics can also be seen when brazing 3003 aluminum plates, another thin aluminum application using Super Alloy 5 and a propane torch.
Choosing the Right Torch for Aluminum Brazing
Super Alloy 5 can be applied with several heat sources, including propane, MAPP gas, natural gas, oxy-MAPP, and oxyacetylene. The size and thickness of the aluminum determine how much heat is needed.
Propane for Thin Aluminum
The two thin aluminum plates in this video are joined with a handheld propane torch.
Because the plates are small, propane supplies enough heat to bring the aluminum to the alloy’s 600°F working temperature. Keep the torch moving across both pieces so the heat is distributed throughout the joint.
Aluminum conducts heat rapidly, so concentrating the flame in one location can cause a thin section to overheat before the rest of the joint reaches brazing temperature.
Oxyacetylene for Thick Aluminum and Large Parts
Larger aluminum parts absorb and dissipate more heat, making it difficult for a small propane torch to bring the entire repair area to the required temperature.
Muggy Weld recommends oxyacetylene for thick aluminum sections, cast aluminum, diamond plate, and large aluminum masses such as boats. Oxy-MAPP can also be used for suitable applications where additional heat is needed.
The aluminum may need to reach approximately 800°F for larger or thicker applications, compared with the 600°F working temperature used on the thin plates in this video.
When brazing aluminum boats, the greater mass of aluminum requires additional preheating and a torch capable of maintaining sufficient temperature throughout the repair area.
Why Super Alloy 5 Powder Flux Is Important
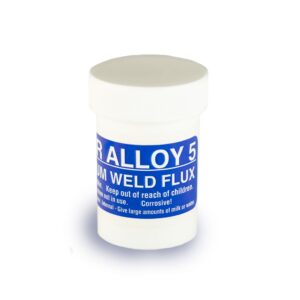
Super Alloy 5 aluminum brazing rods are formulated to work with a matching powder flux that performs two important functions: chemically cleaning the aluminum and indicating when the parent metal has reached the correct brazing temperature.
Aluminum naturally develops an oxide layer that interferes with filler metal bonding. Super Alloy 5 flux removes oxidation and impurities during heating, allowing the brazing alloy to wet the surface and flow through the joint.
The flux also provides a visible temperature indicator. As the aluminum heats, the flux changes from a dry powder into a thin, watery liquid. This transformation signals that the parent metal has reached the proper working temperature and is ready for the brazing rod.
The flux is formulated to remove surface oxidation without extensive pre-cleaning in many applications. However, heavily corroded, painted, or contaminated aluminum should be cleaned before brazing.
Additional Super Alloy 5 Powder Flux Replacement is available separately when more flux is needed. The powder should be stored in a tightly sealed container to limit moisture absorption.
How to Use Aluminum Brazing Rods with a Propane Torch
The procedure shown in the video joins two thin aluminum plates positioned at a right angle. The goal is to bring both plates to the correct working temperature so Super Alloy 5 can flow through the connection.
Step 1: Position the Aluminum Plates
Place the two thin aluminum plates perpendicular to one another, with the edges aligned to form the joint.
The plates should remain in position while heating and applying the filler metal. A close-fitting joint encourages capillary action, allowing the molten alloy to travel between the aluminum surfaces.
Step 2: Apply Super Alloy 5 Flux
Gently heat the end of the aluminum brazing rod with the propane torch, then dip the warm rod into the powder flux.
The flux will adhere to the rod, allowing it to be transferred directly to the aluminum joint.
Apply the flux along the connection between the two plates before introducing the filler metal.
Additional details about the flux’s behavior and application are covered in Muggy Weld’s Super Alloy 5 flux instructions.
Step 3: Heat the Parent Aluminum
Begin heating the aluminum with the propane torch, keeping the flame moving across both plates.
Apply heat broadly rather than concentrating the flame directly on the brazing rod. The aluminum must reach the correct temperature before the filler metal will flow properly.
Move the torch from front to back and side to side, distributing heat throughout the connection.
Avoid overheating the thin aluminum. Although Super Alloy 5 works at a substantially lower temperature than the parent metal’s melting point, prolonged heating in one location can still damage the plates.
Step 4: Watch the Flux Change from Powder to Liquid
Continue heating until the flux changes from a powder into a clear, watery liquid.
This change indicates that the aluminum has reached approximately 600°F, the working temperature required for Super Alloy 5 on thin aluminum.
The liquid flux prepares the joint for the filler metal and provides a visual guide for determining when to apply the rod.
Step 5: Feed the Brazing Rod into the Joint
Once the flux liquefies, touch the Super Alloy 5 rod to the heated aluminum.
The filler should melt against the parent metal and begin flowing through the connection. Continue heating the aluminum broadly while feeding the rod into the joint.
Watch how the alloy travels from front to back and side to side, following the flux through the connection.
This capillary action allows Super Alloy 5 to penetrate between the two plates, creating a continuous bond rather than leaving a large deposit of filler metal along the outside edge.
Apply additional flux when needed to maintain flow as more rod is introduced.
Step 6: Cool and Clean the Finished Joint
After the brazing rod has flowed through the connection, remove the torch and allow the aluminum to cool naturally.
Once the joint has cooled, remove excess flux with warm water and a wire brush.
The completed joint should have a smooth, uniform appearance resembling an extruded aluminum section.
What Makes a Good Aluminum Brazed Joint?
A properly brazed aluminum joint should show consistent filler penetration and a smooth transition between the joined parts.
In the two-plate application, Super Alloy 5 flows through the connection instead of accumulating only along the outside edge. The finished joint has an extruded appearance, with the filler forming a continuous connection between the aluminum plates.
Characteristics of a properly completed joint include:
- Smooth, uniform filler distribution
- Penetration from front to back and side to side
- Minimal visible pinholes or porosity
- Consistent bonding along the connection
- Little excess filler requiring removal or finishing
The appearance of the finished joint helps illustrate the alloy’s flow characteristics, although visual inspection alone cannot establish its mechanical strength.
Super Alloy 5 can also be bent, drilled, tapped, threaded, machined, anodized, or plated after brazing, making it suitable for aluminum parts that require additional finishing.
Troubleshooting Aluminum Brazing Rods and Flux
Several common problems can occur when brazing aluminum. Most can be traced to insufficient base-metal temperature, moisture in the flux, or incomplete filler flow.
Why Does the Aluminum Brazing Rod Ball Up Instead of Flowing?
If the rod forms a ball instead of flowing into the joint, the base aluminum is usually too cold.
Knock the ball off, move the rod away from the work area, and continue heating the aluminum.
Add more flux and wait until it liquefies before reapplying the rod.
If the rod continues to ball up, the torch may not be supplying enough heat for the size or thickness of the aluminum. Larger parts may require a stronger heat source to maintain the correct working temperature.
What If the Powder Flux Turns Liquid Inside the Container?
Super Alloy 5 powder flux can absorb moisture from the air if the container is left open.
When this happens, the flux may become liquid or pasty inside the bottle. It is still usable, although the moisture makes it more difficult to handle than dry powder.
Apply the flux as usual. During heating, watch for the moisture-affected flux to return to a powder before changing back into a liquid as the aluminum reaches brazing temperature.
Always cap the flux container immediately after use to reduce moisture absorption.
Why Isn’t the Filler Metal Penetrating the Joint?
If the filler remains on the outside of the joint instead of flowing through the connection, check the aluminum temperature and flux distribution.
The parent metal must be hot enough for the rod to melt against it, and the flux must reach the areas where the filler needs to flow.
Continue heating the aluminum broadly, allowing the flux to liquefy before adding more rod.
Tight-fitting joints encourage capillary action, while excessive gaps may require additional filler to bridge the opening.
How Do You Remove Excess Aluminum Brazing Flux?
After the brazed joint has cooled, remove remaining flux with warm water and a wire brush.
Cleaning removes flux residue and makes the completed joint easier to inspect.
Can Super Alloy 5 Aluminum Brazing Rods Be Used for TIG Welding?
Yes. In addition to torch brazing, Super Alloy 5 can also be used as a TIG welding rod for aluminum.
TIG welding uses a different process and equipment than the low-temperature propane brazing shown in this video. When used as a TIG filler, Super Alloy 5 is applied under TIG welding conditions rather than the 600°F torch brazing procedure.
This versatility allows the same alloy to be used for multiple aluminum joining applications, including suitable cast aluminum repairs.
Common Applications for Aluminum Brazing Rods
Super Alloy 5 is used for joining and repairing a variety of aluminum components, from thin sheet metal to larger castings.
Common applications include:
- Thin aluminum sheet and plate
- Aluminum tubing and fittings
- Automotive aluminum components
- Aluminum radiators and condensers
- Aluminum HVAC and air conditioning lines
- Cast aluminum housings and brackets
- Aluminum boats and marine components
- Diamond plate aluminum
- Industrial aluminum equipment
The appropriate torch and working temperature depend on the size, thickness, and condition of the aluminum.
Thin sections can often be brazed with propane or MAPP gas, while larger aluminum masses require greater heat input. In either case, the flux provides the visual temperature indicator needed to determine when the aluminum is ready for the filler metal.
The two-plate application illustrates how Super Alloy 5 aluminum brazing rods flow through a properly heated joint. Watching the flux change from powder to liquid, maintaining broad heat across the aluminum, and allowing the filler to penetrate the connection are the key steps shown in the video.
Disclaimers:
Before using Muggy Weld products, please review and follow the welding safety guidelines provided by the American Welding Society (AWS): https://www.aws.org/Standards-and-Publications/Free-Resources/#YourResources.
Additional product safety information is available at https://muggyweld.com/safety-guidelines
Muggy Weld LLC shall not be liable for any loss, injury, claim, liability, or damage of any kind resulting from or related to (a) the use of this website or its contents, (b) the use or misuse of any welding products or services obtained through this website, (c) errors in or omissions in the information provided, (d) the unavailability or interruption of this website or its features, (e) reliance on any instructions, techniques, or demonstrations presented on this website.
Safety Data Sheets (SDS) are available upon request with purchase from MuggyWeld.com.
Updated 10/22/26