Troubleshooting Super Alloy 5: Tips and Techniques for Proper Use
Super Alloy 5 is an aluminum welding, brazing, and soldering repair kit containing a rod and flux combo. Each Super Alloy 5 rod is 18 inches long and is available in either 1/16″ and 3/32″ diameter.
We recommend using the 1/16″ for repairing thin aluminum such as home, auto, and commercial air conditioning units, auto radiators, and evaporators. The 3/32″ works well for bridging gaps, larger holes, cast aluminum, a variety of more significant, thicker aluminum.
Tip: If you already have the 3/32″ rod, you can use a hammer to flatten the rod to the desired thickness.
Troubleshooting: Note the standard brass torch tip shown–this torch tip will not work with Super Alloy 5 because propane can provide more heat than this tip will allow. We recommend using a Bernzomatic torch tip, as shown in the majority of the aluminum repair videos on our site (when using MAPP or propane as fuel.) We believe torches that have an adjustable flame control tend to work a little better because they can push more heat, which you often need with aluminum.
Technique: Never allow the parent aluminum to sit flush upon a metal table when torch brazing, as the table will pull the heat away from the repair area. The same recommendation applies to closing the jaws of a vise too close to the work area. An easy solution to create a buffer between the parent metal and the table/vise is to lift the aluminum off the table with a steel wire. Another technique is using ceramic tiles or using fire bricks etc.
Technique: Apply the flux by briefly heating the end of the rod for a second, then dip the rod into the powdered flux; repeat if the flux doesn’t grab well.
Troubleshooting: A common mistake is blocking the area with the rod before the aluminum has reached the working temperature. This error in technique prevents properly heating the repair area. Instead, broadly heat the area adjacent to the hole or crack. This technique prevents the surrounding aluminum from sucking the heat away.
Proper steps for using Super Alloy 5:
- Preheat
- Broadly heat parent metal
- Apply flux
- Keep torch moving to slowly bring the parent metal to proper working temperature
- Watch for flux to become clear and watery
- Apply rod
When brazing thin aluminum, always keep the heat moving to prevent overheating/melting the metal. In this video, we turned the torch down a bit, so the process would be easier to follow.
As you can see, there were some contaminates around the puncture, so we added a little more flux, dabbed the rod to test the temperature, and heated the rod slightly to soften it as we applied it to the aluminum. The next hole will close much faster since the aluminum is already warmed. Notice the flux is more active than before, cleaning the oil, dirt and, grease away while sealing the hole shut. Quickly pull the torch away once you see the rod flow out flat.
Technique: Be sure to preheat a little longer when joining two pieces of aluminum together, to ensure the parent metal is at the proper working temperature. The powder flux will pre-clean the metal and act as a temperature guide, transforming to indicate when the metal is hot enough to flow the Super Alloy 5 rod.
Technique: We heated the front back and side to side on both plates to bring the aluminum to the correct temperature. The plates pictured are only a couple of inches in length and thin. If we were working on a larger project, we would preheat longer and possibly need a hotter torch setup like oxyacetylene.
Technique: When working on thick to thin aluminum, add more heat to the heavier section to evenly bring both pieces of metal up to temperature at relatively the same rate.
Troubleshooting: If we were to add the rod before the plate was ready, the rod would ball up. Discard the balled-up material and continue heating the parent metal.
Disclaimers:
Please visit https://www.aws.org/Standards-and-Publications/Free-Resources/#YourResources prior to using Muggy Weld products, and adhere to all AWS welding safety guidelines.
Further product safety information is available at http://muggyweld.com/safety-guidelines
Muggy Weld LLC shall not be liable for any loss, injury, claim, liability, or damage of any kind resulting in any way from (a) your use of this Site, (b) any services or products obtained from this Site, (c) any errors in or omissions from this Site, (d) the unavailability or interruption of this Site or any features thereof, (e) any content contained on this Site.
MSDS sheets available with purchase from MuggyWeld.com, upon request.
Check Out These Products
-
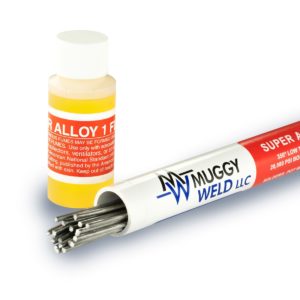
Super Alloy 1 Pot Metal Solder and Multi-Metal Solder
Price range: $69.00 through $109.00350º F multi-metal solder joins pot metal and all white metals, in any combination🌡 Melting Temperature 350 / 177 ⇄︎ Bonding Strength 20000 psi, 137.89 MPa -
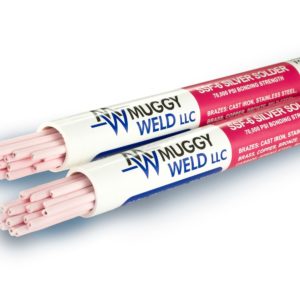
SSF-6 Silver Solder Rod: Flux-Coated SSF-6 56% Brazing Rod
Price range: $69.00 through $260.00High-Strength, 56% Silver Solder Rod🌡 Melting Temperature 1150 / 621 ⇄︎ Bonding Strength 70000 psi, 482.63 MPa 🔧︎ Sizes Available (in) 1/16 🔧︎ Sizes Available (mm) 1.58 -
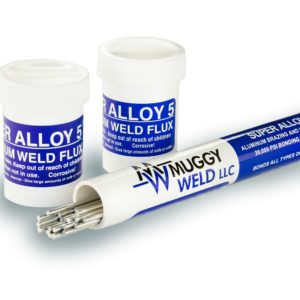
Super Alloy 5 Aluminum Welding and Brazing Rod
Price range: $69.00 through $109.00600°F aluminum welding, brazing, and soldering rod. Ideal for aluminum boat repair and cast aluminum.🌡 Melting Temperature 600 / 317 ⇄︎ Bonding Strength 30000 psi, 206.84 MPa